Blog
In a field that evolves daily, staying ahead means staying informed.
Explore in-depth articles designed to help you solve complex challenges,
maximize your machine’s ROI.
Stay ahead in a competitive market.

In a field that evolves daily, staying ahead means staying informed.
Explore in-depth articles designed to help you solve complex challenges,
maximize your machine’s ROI.
Stay ahead in a competitive market.
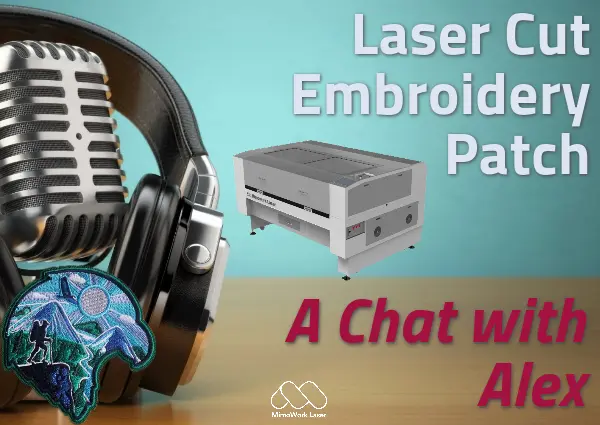
News | Sep-4-2023
Many people are confused with the focal length adjustment when using a laser machine.
To answer the questions from clients, today we will explain the specific steps and attention to how to find the right CO2 laser lens focal length and adjust it.
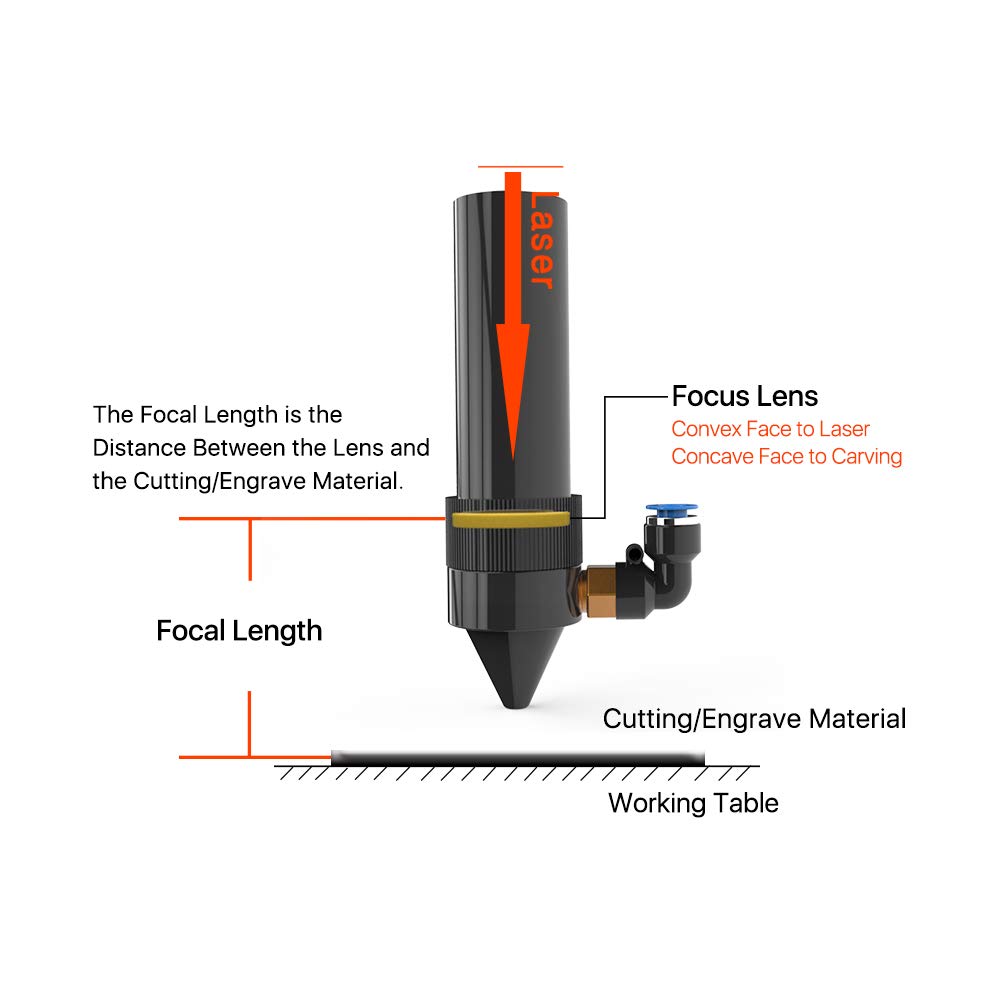
For a laser machine, the term “focal length” usually refers to the distance between the lens and the material being processed by the laser.
This distance determines the focus of the laser beam that concentrates the laser energy and has a significant impact on the quality and precision of the laser cutting or engraving.
Let’s proceed with the laser engraving machine operation and commence today’s instructional session.
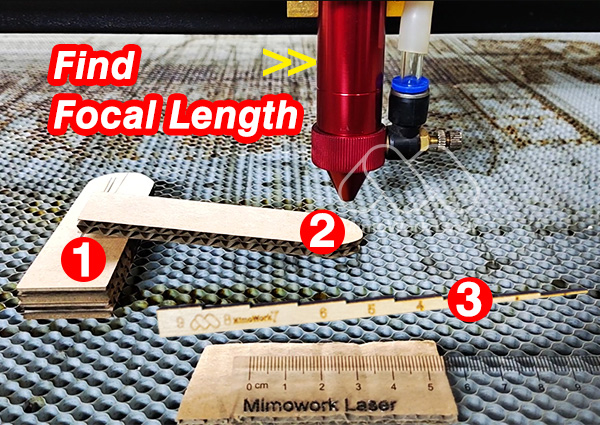
For laser focal alignment, you will require only two cardboard spacers.
The optical lens system in your laser engraving head precisely focuses the dispersed laser beam into a micron-level focal spot (geometrically conical). This focal zone achieves peak power density, enabling optimal material processing performance.
Technical Note:
Focal parameters are lens-dependent. Always verify specifications for your installed lens.
Secure calibration substrate:
Focal analysis:
Perform diagnostic engraving:
Dimensional verification:
For the focal ruler, you can always make your own with your laser engraving machine.
If you want to get the design file of the focal ruler for free, send us an email.
Shoot the laser to the cardboard at different heights, and compare the actual burning marks to find the correct focal length.
Put the cardboard scrap evenly on the working table and move the laser head over it at 5 millimeters high.
Next, press the “pulse” button on your control board to leave burning marks.
Repeat the same procedure, change the laser head to different heights, and press the pulse button.
Now, compare the burning marks and find the smallest spot engraved.
You can choose either method to find the correct focal length.
How to Cut Thick Plywood | CO2 Laser Machine
When cutting materials, we usually suggest adjusting the focus spot slightly below the material to get the best cut.
For example, you can adjust the laser head to 4mm or even 3mm above the material (When the Focal Length is 5mm).
In this way, the most powerful laser energy will be concentrated inside the material, better to cut through the thick material.
Laser Cutting PlywoodBut for laser engraving, you can move the laser head above the material surface a little bit higher.
When the Focal Length is 5mm, move it to 6mm or 7mm.
This way, you can get a blur engraving result and enhance the contrast between the carving effect and raw materials.
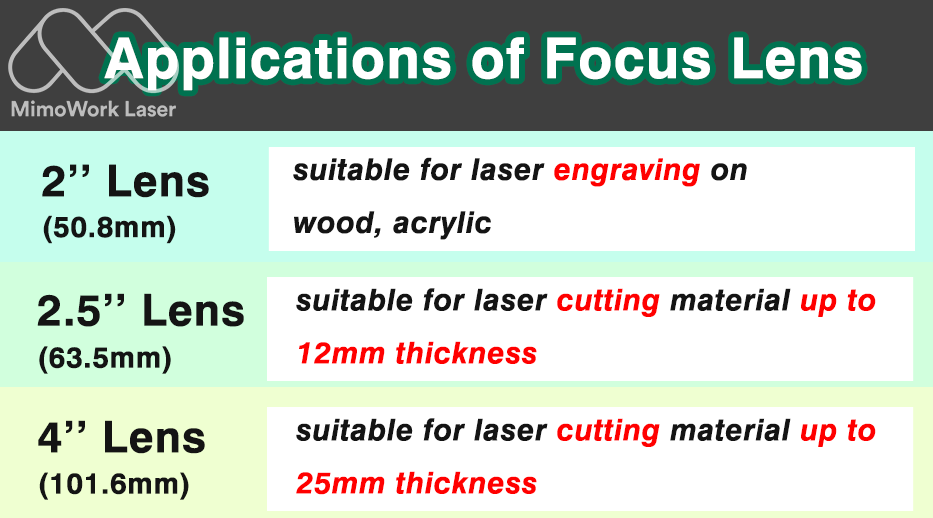
Laser Engraving WoodWe also suggest choosing a suitable lens based on materials and requirements.
A shorter focal length like 2.0″ means a smaller focal spot and focal tolerance, suitable for laser engraving high DPI pictures.
For laser cutting, a longer focal length can guarantee cutting quality with a crisp and flat edge.
2.5″ and 4.0″ are more suitable choices.
The longer focal length has a deeper cutting distance.
I list a table here regarding the focal lens choices.
For Laser Cutting Thick Material
For thick acrylic or wood, we suggest the focus should lie in the middle of the material.
Laser testing is necessary for different materials.
How thick acrylic can be laser cut?
High power and lower speed is usually a well-advice choice, for a more detailed procedure you can inquire us!
Laser Cutting Acrylic