Blog
In a field that evolves daily, staying ahead means staying informed.
Explore in-depth articles designed to help you solve complex challenges,
maximize your machine’s ROI.
Stay ahead in a competitive market.


In a field that evolves daily, staying ahead means staying informed.
Explore in-depth articles designed to help you solve complex challenges,
maximize your machine’s ROI.
Stay ahead in a competitive market.
News | Oct-26-2026 | Mimowork

Laser engraving on acacia wood delivers beautiful, rustic results, but this oily, dense hardwood is trickier to work with than maple or basswood. Start with clean, unfinished, kiln-dried stock and always run a test grid first. Acacia’s naturally shifting grain, density fluctuations and embedded wood oils often cause patchy contrast, blurry gradients and excess soot. Tune power, speed and air assist to compensate for its unique properties before engraving your final piece.
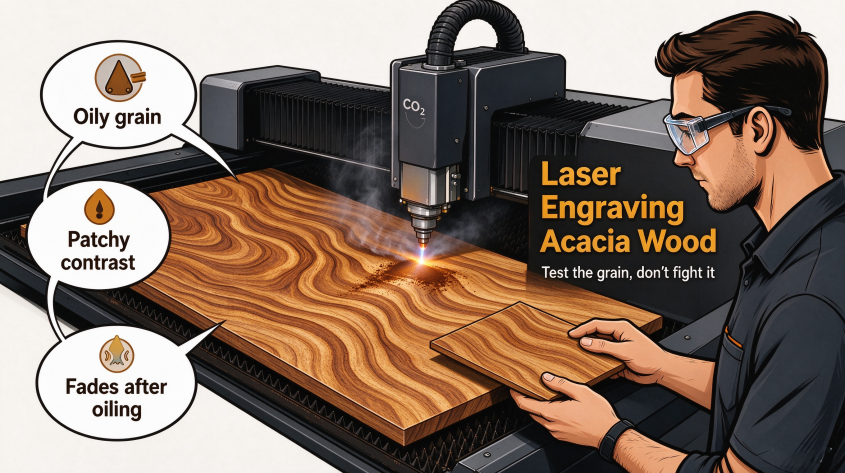
Acacia remains a top pick for custom laser-engraved goods: serving trays, charcuterie boards, personalized gifts, wall signs and furniture accents. It boasts great hardness, rich warm tones and dramatic, swirling grain that gives every piece one-of-a-kind character.
That same natural beauty creates the biggest engraving headaches. Acacia is not homogeneous, and these three traits separate it from most other hardwoods:
1.Uneven density across the same board
Denser grain zones absorb laser energy slower, while softer streaks burn darker. One power setting will produce a light mark in one spot and heavy charring only centimeters away.
2.Built-in natural wood oils
Acacia holds more inherent oil than many hardwoods. These oils can flare during engraving, create extra smoke, and will alter the final contrast once food-safe oil or wax is applied afterward.
3.Wild, high-contrast native grain
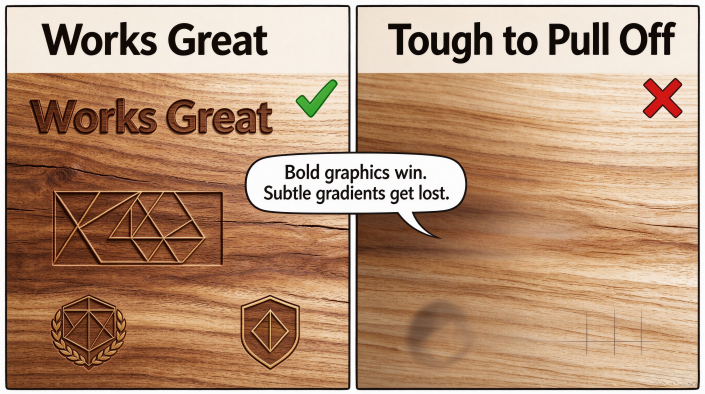
Its alternating light and dark streaks compete with your engraved design. Fine photos and soft gradients easily get washed out and muddy, whereas bold logos, clean text and simple line art shine.
Key rule upfront: Acacia rewards bold graphics; it punishes subtle photographic halftones.
Not all acacia boards engrave alike. Prioritize kiln-dried, low-moisture, unfinished stock. Green or poorly dried acacia will warp, smoke heavily and engrave inconsistently.
Sand uniformly along the grain. 180–240 grit is the sweet spot for most engraving work; skip uneven sanding that leaves low/high spots.
Wipe the surface completely with a lint-free cloth to remove sanding dust. Dust will burn and leave random dark smudges over your engraving.
Inspect for loose knots, cracks or heavy oil pockets. These spots are almost guaranteed to ruin fine details and should be avoided for high-end orders.
Important note: Pre-finished acacia with polyurethane, varnish or thick oil coatings is not recommended for engraving. The coating melts, bubbles and releases extra smoke, while the engraved contrast becomes unpredictable.
This is the step most beginners skip, and it’s the #1 cause of disappointing results on acacia.
✅ Best choices: Bold sans-serif text, thick outlined logos, simple line art, geometric patterns
⚠️ Use cautiously: Small thin fonts, delicate filigree
❌ Poor fit: Smooth photo gradients, subtle grayscale portraits. The native grain will clash and muddy mid-tones beyond repair.
If you still want to engrave photos on acacia: crank up contrast aggressively, reduce mid-tone detail, and use a sparse halftone pattern instead of standard grayscale engraving.
A CO2 laser is the standard choice for acacia wood engraving.
• Confirm your exhaust fan and fume extraction run at full capacity. Acacia’s natural oils generate far more smoke than lighter woods like basswood.
• Set focus precisely on the top surface of the blank. Acacia’s curved grain and slight surface undulations make focus error extremely visible.
• Set moderate air assist. Too much air can blow fine ash into surrounding grain; too little traps soot and causes heavy charring.
There is no universal “perfect setting” for acacia. Even two boards from the same supplier can behave differently. Build a test grid on scrap from the exact same batch.
Adjust only one variable at a time and document your results:
| Variable | What It Controls | What to Watch for on Acacia |
| Laser Power | Heat delivered into the wood | Too high = deep char, oil flare, black bleed into surrounding grain; Too low = faint, washed-out mark |
| Engraving Speed | Dwell time on each spot | Slower speed builds contrast but increases soot; faster speed reduces burning but may lack definition |
| DPI/LPI | Engrave line density | Higher DPI sharpens text but amplifies patchiness on inconsistent grain |
| Air Assist | Smoke and ash clearance | Balance to remove debris without stripping away contrast |
Aim for controlled dark browning, not jet-black char. Deep black burn on acacia almost always bleeds and looks messy.
Run the job while keeping a close eye for oil flare-ups and excess smoke.
Let the blank fully cool before judging contrast. Hot acacia looks darker than its final cured appearance.
• If patchy: Your board has large density variation; redesign to avoid placing fine details across heavy grain lines.
• If too dark/charred: Reduce power or slow down the dwell time.
• If barely visible: Slightly increase power or lower speed, but make small increments.
Once cooled, brush away loose ash with a soft bristle brush. Compressed air works well, but avoid blasting ash deep into engraved grooves.
This is acacia’s famous trap:
Raw engraving contrast looks much stronger before applying food-safe oil, beeswax or mineral oil. Most finishing oils will darken the whole board and noticeably reduce engraving contrast.
👉 Always test your full finishing sequence on your test scrap before batch production. Tune your engraving to be slightly darker than your target look if you plan to oil the finished goods.
These are test baselines for CO2 lasers, not fixed production values. They are calibrated around acacia’s oily hardwood nature.
| Target Result | Testing Strategy | Main Risk to Avoid |
| Crisp text & logos | Moderate power, medium speed, standard DPI | Bleeding char along thin letter strokes |
| Decorative line patterns | Slightly lower energy, consistent air flow | Uneven darkness across swirling grain |
| Photographic halftone engraving | Boost image contrast, sparse halftone | Muddy, unrecognizable mid-tones |
| Batch commercial orders | Lock in one wood grade, batch-test every new pallet | Board-to-board variation |
Save your winning recipes with notes: supplier of the acacia, moisture level, grit of sandpaper, and finish type you will apply. This is the only reliable way to scale repeat orders.
✅ Problem: Engraving comes out patchy, with light and dark streaks
Root cause: Natural density and grain variation in acacia.
Fix: Layout designs to avoid crossing heavy grain swirls. Source more uniformly graded acacia blanks, or adjust artwork to lean into the rustic aesthetic instead of fighting it.
✅ Problem: Heavy black soot covers the whole engraved area
Root cause: Excess heat igniting acacia’s natural oils; insufficient extraction or mismatched air assist.
Fix: Lower power, increase speed, and optimize airflow. Acacia creates more smoke than softwoods, so under-powered extraction is a frequent culprit.
✅ Problem: Small text turns fuzzy and unreadable
Root cause: Wrong focus, too much power bleeding heat sideways, or thin strokes fighting grain.
Fix: Enlarge fonts, thicken stroke weight, recheck focus, and dial back power to limit heat spread.
✅ Problem: Engraving looks great raw, fades after oiling
Root cause: Acacia absorbs finishing oil evenly across engraved and unengraved surfaces.
Fix: Make your raw engraving darker during laser work, or select a wax topcoat that preserves contrast better than penetrating mineral oil.
✅ Problem: Results shift between different boards from the same order
Root cause: Acacia logs naturally vary widely.
Fix: Treat every new pallet as a new material and run a quick test grid before starting production.
Related Guide: Best Laser Marking Machine for Metal: A Professional Buyer’s Guide (2026)
Yes, acacia is an excellent candidate for laser engraving, making it a popular choice for charcuterie boards, personalized gifts, and custom home décor. Its distinctive natural grain creates a unique rustic aesthetic, while its density and natural oil content require careful adjustment of laser settings. Using a suitable Laser Marking Machine can help produce precise, detailed designs on acacia wood. However, because acacia is harder and less forgiving than basswood or maple, it is best to test different power and speed settings on a scrap piece before engraving the final product.
A CO2 laser is the standard solution. Lower wattage desktop CO2 lasers work for shallow decorative marking; higher wattage industrial CO2 units deliver more consistent results for high-volume acacia production.
Yes. Uniform sanding removes machining marks and creates a consistent surface. Uneven sanding will compound acacia’s natural contrast issues.
Acacia contains naturally occurring oils and has highly variable grain density. Maple is far more consistent internally, while acacia’s beautiful grain is the source of its engraving inconsistency.
Absolutely. The laser mark itself is safe once cleaned properly. The food safety comes from your final finish. Test your chosen food-grade oil or wax on scrap first, as it will change your engraving appearance.
Laser engraving acacia wood requires more than the right power and speed settings. Its natural grain, uneven density, and oil content can all affect engraving contrast, so testing the actual wood and accounting for the final finish are essential for consistent results.
If you plan to engrave acacia wood regularly, choosing a laser system that matches your material, design details, and production requirements can make the process more predictable. Explore MimoWork’s laser engraving solutions to learn more about equipment options for custom wooden products, personalized gifts, and decorative applications.
News | Sep-14-2026